Building a wooden boat requires the right tools, materials, patience and information.
To build a wooden boat:
- Collect all the materials and tools needed
- Plan the boat layout and design
- Create the center rib & transom
- Create the boat frame
- Add the seat rails & keel strip
- Add the wood planks & seats
- Add epoxy, sand & paint the boat
Building a wooden boat will take approximately 1 month when building a smaller wooden boat under 20 ft. and it will take 2 to 3 months when building a larger wooden boat over 20 ft.
The cost to build a wooden boat will range from $2,500 for a smaller wooden boat to over $3,500 to $5,000 for larger wooden boats. This cost includes all materials and tools needed for the build.
The largest cost when building a wooden boat is the cost of wood. The cheapest cost when building a wooden boat is the boat plans and designs.
The types of wooden boats that can be built include cabin cruisers, sailboats, canoes/kayaks, runabout outboard boats, paddle wheel & runabout inboard boats, novelty boats, houseboats, hydroplanes and race boats.
We include products we think are useful for our readers. If you buy through links on this page, we may earn a small commission.
1. Collect All The Materials & Tools Needed
The first step in building a wooden boat is the collect all the materials and tools need to complete the boat build.
The tools and materials needed to build a wooden boat are:
- Wood: Boat builders will need to get all the wood needed for the build. Popular woods used to build a wooden boat are teak wood, oak and marine plywood for the boat's exterior and pine wood for the boat's interior. Pine is best used for the boat's interior since it has a nice color, finishes well and is light, thereby reducing the overall weight of the boat. The price of marine plywood ranges from $50 to $250 per sheet depending on the thickness and dimensions of the sheet
- Screws: Boat builders will need many batches of screws to screw sections of the boat and wood together. A 100-screw pack will typically cost $10
- Safety gloves & goggles: Boat builders will need safety gloves and goggles when operating tools. This will prevent sawdust and other materials from getting in the eyes. Safety gloves and goggles will cost approximately $25
- Drills & saws: Boat builders will need drills and saws to cut wood and attach it to other wood pieces. Drills and saws will cost approximately $200 to $300
- Wood sanding machine: Boat builders will need a wood sanding machine for sanding wood. A sanding machine will cost approximately $300 to $500
- Epoxy resin: Boat builders can use epoxy resin on the wood material to protect the wood and help keep it waterproof. Epoxy resin costs approximately $70
- Wooden boat paint: Boat builders will need marine wooden paint to paint the wooden boat and protect the wood from the elements. Marine paint will cost approximately $200
- Boat designs & plans: Building a boat will require the boat builder to work from a boat plan. Boat builders can pick up over 500 boat plans for approximately $50
- Varnish: Varnish will add protection and shine to the boat's interior wooden surfaces. Varnish will cost approximately $60
2. Plan The Boat Layout & Design

The second step in building a wooden boat is to plan the boat layout and design.
A boat builder will need boat designs, dimensions, and plans to build the exact wooden boat they want.
Boat builders can access 518 boat plans with 40 boat construction videos. This will provide the exact dimensions to build the majority of recreational wooden boats.
Finding the right boat plans and designs should take 20 minutes to do.
3. Create The Center Rib & Transom
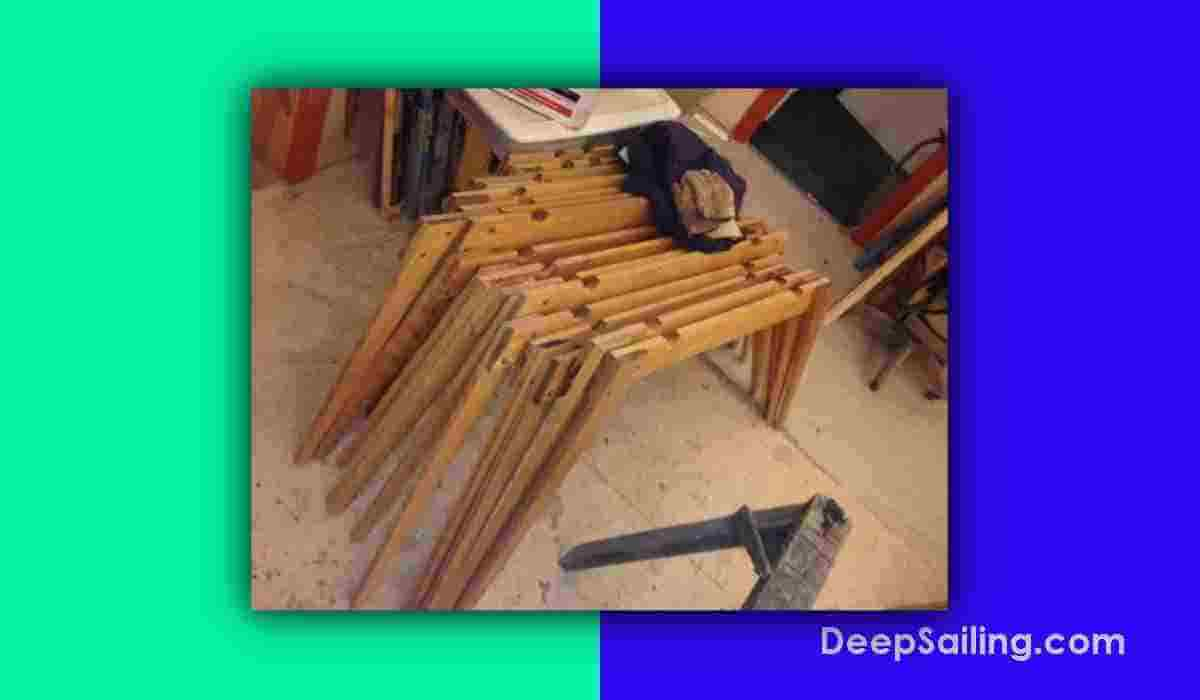
The third step in building a wooden boat is to create the center rib and transom.
To create the center rib & transom:
- Glue the hardwood floorboards together to create the transom
- Sandwich the transom in between two flat pieces of wood or metal and then clamp it tight to make sure that the transom is flat. Use some kitchen wrap to make sure that the two pieces of wood do not get glued to the transom
- Sand the pieces of wood that will be used for the center rib, glues them and clamp them before you glue them together.
- Once the glue is dry, cut out the keel and chines
Creating the rib and transom will take a boat builder 2 to 3 hours. However, this timeframe will vary massively based on the size of the boat and the boat design.
4. Create The Boat Frame
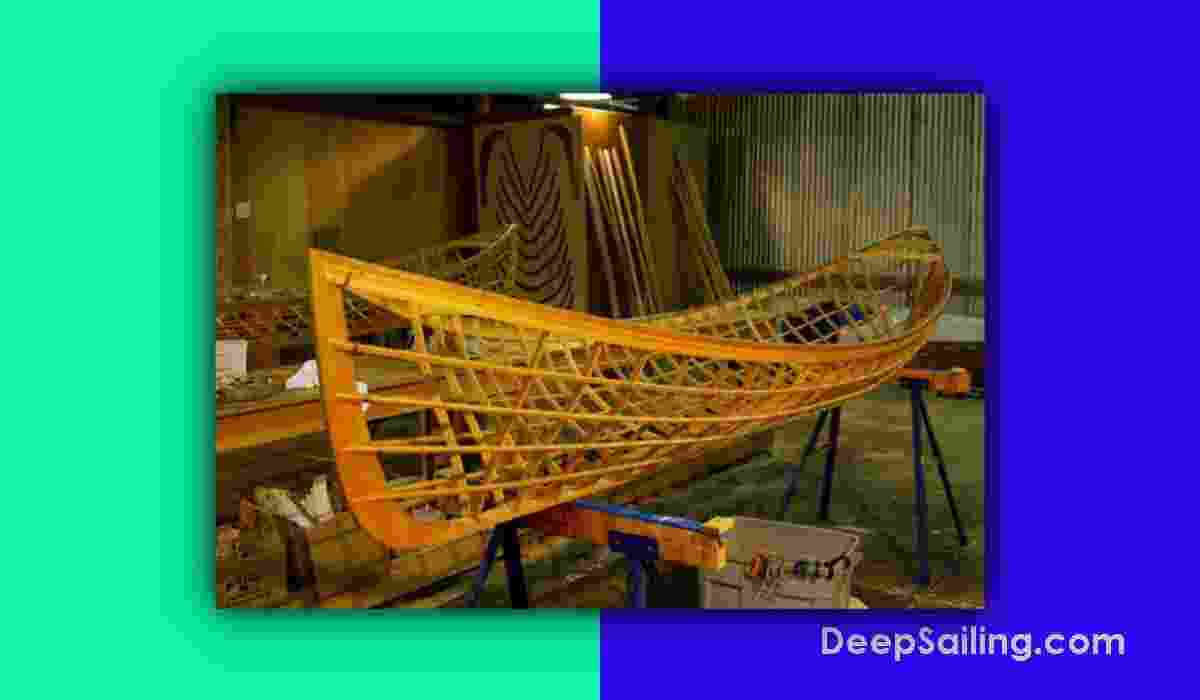
The fourth step in building a wooden boat is to create the boat frame.
To create the boat frame:
- Follow the boat design: Determine the size, shape, and style of your boat. This will dictate the number and spacing of frames required
- Make a full-size drawing: A full-size drawing will help you to lay out the frames accurately. This can be done using paper, plywood or a computer program.
- Cut the keel and stem: The keel and stem are the backbone of the boat. Cut them to the appropriate size and shape
- Determine the frame spacing: Calculate the distance between each frame based on the size and shape of your boat. This will vary depending on the design chosen
- Cut the frames: Use the full-size drawing to create a template for each frame. Trace the template onto the wood and cut out each frame
- Install the frames: Place each frame in its designated location and secure it to the keel and stem using clamps or screws
- Check the alignment: Ensure that each frame is aligned properly with the keel and stem. Adjust as necessary
- Install the stringers: The stringers are the horizontal members that connect the frames. Install them in the appropriate location and secure them to the frames
- Install the planking: The planking is the outer layer of the boat. Install it over the frames and stringers, securing it with screws or nails
Creating a frame for the boat will take approximately 3 to 5 hours to complete. However, this timeframe can vary based on the size of the vessel being built.
5. Add The Seat Rails & Keel Strip
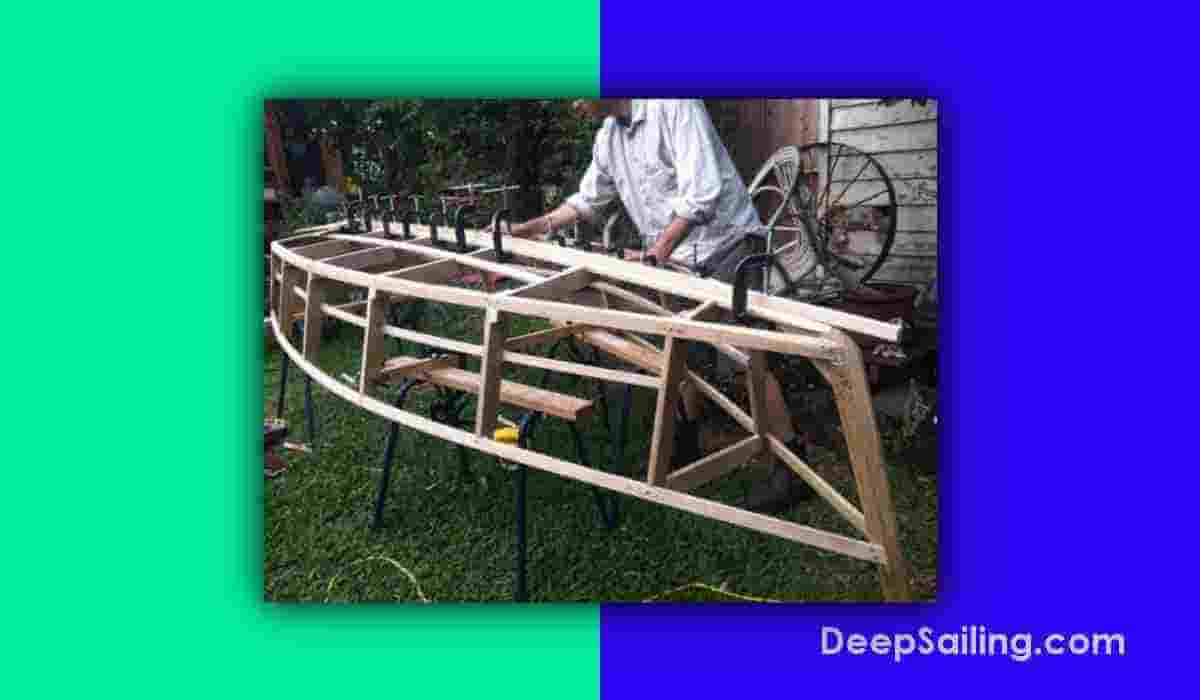
The fifth step is to add the seat rails and keel strip. Then sand and patch the area.
To create the seat rails:
- Determine the location and size of the seat rails: This will depend on the design of your boat and the type of seat you plan to install
- Measure and cut the seat rails: Use a saw to cut the rails to the appropriate length. Ensure that they fit snugly into the boat
- Sand the edges of the seat rails: Use sandpaper to smooth the edges of the seat rails
- Install the seat rails: Secure the rails in place using screws or bolts making sure they are level and well-supported
To create the keel strip:
- Determine the length of the keel strip: Measure the length of the keel and cut the keel strip to match
- Sand the surface of the keel: Use sandpaper to roughen the surface of the keel. This will help the adhesive to bond more effectively
- Apply the adhesive: Apply a marine-grade adhesive to the keel strip making sure to spread it evenly
- Install the keel strip: Press the keel strip firmly onto the keel ensuring that it is centered and well-aligned
Creating the keel strip and seat rails will take approximately 1 to 2 days to complete. This will vary based on experience and the size and design of the boat being built.
6. Add The Wood Planks & Seats
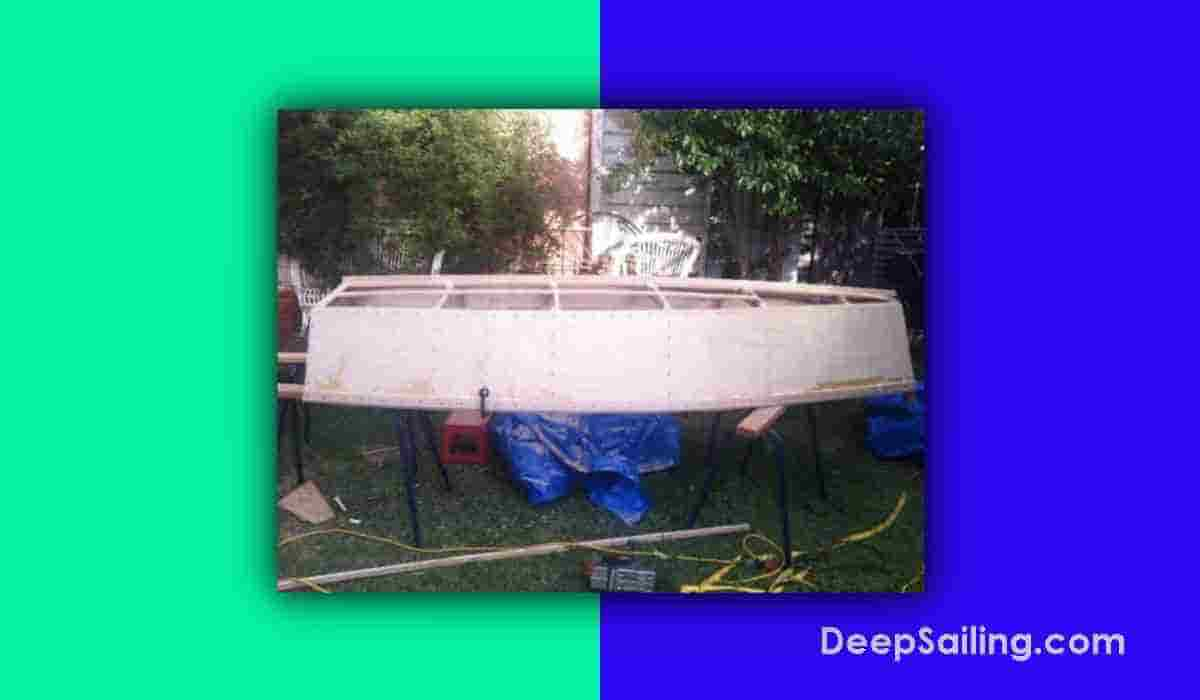
The sixth step in building a wooden boat is to add wooden planks and seats.
To add wooden planks:
- Prepare the planks: Cut the planks to the appropriate size and shape for your boat. If necessary, steam or soak the planks to make them more pliable and easier to work with
- Apply glue to the frames and keel: Apply a marine-grade adhesive to the frames and keel where the planks will be installed
- Install the planks: Begin at the bottom of the boat and work your way up. Place each plank onto the adhesive and secure it to the frames using clamps or screws
- Repeat the process: Continue adding planks until the entire boat is covered. Be sure to sand each plank before installing the next one to ensure a smooth and even surface
- Finish the planks: Once all of the planks are installed, sand the entire surface of the boat to smooth out any rough spots. Finish the planks with paint, varnish, or another protective coating.
To add the seats to the wooden boat:
- Determine the location of the seats: Decide where you want to install the seats and mark the locations on the boat
- Cut the seat supports: Cut pieces of wood to the appropriate size to serve as the supports for the seats
- Install the seat supports: Secure the supports to the frames using screws or bolts. Ensure that they are level and well-supported
- Cut the seat planks: Cut the seat planks to the appropriate size and shape. Sand the edges to ensure a smooth surface
- Install the seat planks: Place the seat planks onto the supports and secure them using screws or bolts. Be sure to leave enough space for cushions or other seat padding
- Finish the seats: Sand the surface of the seats to smooth out any rough spots. Finish the seats with paint, varnish or another protective coating
Adding wooden planks and seats to the boat will take 2 to 3 days to complete. This timeframe will vary based on the size and design of the wooden vessel.
7. Add Epoxy, Sand & Paint The Boat
The seventh step of building a wooden boat is the add epoxy, sand and paint the boat.
After the wooden boat has been constructed, adding epoxy, sanding, and painting it are important steps to protect the wood and provide a finished look.
Here are the general steps for adding epoxy, sanding, and painting a wooden boat:
- Prepare the boat: Before adding epoxy, ensure that the boat is completely dry and free of any dust or debris. Cover any areas that you don't want to be coated with epoxy
- Mix the epoxy: Follow the manufacturer's instructions to mix the epoxy resin and hardener. Use the recommended ratio of resin to hardener for the best results
- Apply the epoxy: Using a brush, apply the epoxy to the boat's surface. Work in small sections, and apply enough epoxy to cover the surface without it running or dripping.
- Sand the epoxy: After the epoxy has dried, use sandpaper to sand the surface smooth. Start with coarse grit sandpaper and work your way up to a finer grit sandpaper. Be sure to wear a mask and safety glasses to protect yourself from the dust
- Clean the boat: After sanding, wipe down the boat with a clean, damp cloth to remove any dust
- Paint the boat: Apply a marine-grade paint to the boat using a brush or spray gun. Follow the manufacturer's instructions for the best results. Allow the paint to dry completely before applying a second coat
- Sand the painted surface: After the paint has dried, use a fine grit sandpaper to sand the surface of the boat. This will help the next coat of paint to adhere better
- Apply additional coats of paint: Apply additional coats of paint as necessary, sanding between each coat. This will help to build up a smooth, even finish
- Finish the boat: Once the final coat of paint has dried, inspect the boat for any rough spots or imperfections. Sand any areas that need attention, and touch up the paint as needed
Frequently Asked Questions
Below are the most commonly asked questions about building a wooden boat.
What Types Of Wood Are Used To Build A Wooden Boat?
The types of wood used to build a wooden boat are:
- Natural Wood: Natural wood like teak, cedar, oak and tuatara are commonly used to build a wooden boat. They are hard and have natural chemicals that prevent marine animals from interfering with the boat's structure. Oak is the most popular hardwood used to build the wooden boat's exterior like the hull and keel area which are always exposed to the seawater
- Plywood: Most amateur boat builders like to use marine plywood since it is easy to bend into the shapes that they want. It is also considerably cheaper than natural woods
- New Woods: Azobe, Iroko, Mahogany, Okoume Keruing and Merbau are popular new woods used in building wooden boats
The ideal wood is one that will is resistant to rot and will not allow marine wildlife to get inside and destroy the structure. The wood used to build a wooden boat should be Forest Stewardship Council (FSC) certified.
The buoyancy of wood means that it will ride higher in the water.
The abrasion resistance of the wood will vary according to how dense and hard the wood is so typically hardwoods are used to make the exterior of the boat while softwoods are used for the boat's interior.
What Are The Best Types Of Wood To Build A Wooden Boat?
The best types of wood to build a wooden boat are teak wood and marine plywood as it is dense, hard, can handle stress and abuse from seawater, it can naturally bend and it contains natural chemicals that prevent rotting.
What Is The Worst Type Of Wood To Build A Wooden Boat?
The worst type of wood to build a wooden boat is pine wood on the exterior as pine wood will rot very fast. While pine wood is fine to use on a boat's interior, using it for constructing the exterior should be avoided.
What Are The Construction Methods Used To Build A Wooden Boat?
There are 5 main construction methods used to build a wooden boat which are:
- Stitch & Tape: This is the simplest and fastest technique when it comes to building a boat. This construction method employs the use of plywood which is then “stitched” together using epoxy resin or glue and some other complex cuts to form the hull of the boat. You do not need specialized tools when using this method. Duct tape, copper wire and cable ties are popularly used to stitch the plywood together. If the boat is being built for marine waters, then copper wires are the best since they do not corrode easily. Once the boat has been stitched together, a thick layer of epoxy or fiberglass is used to keep water away from the “stitched” areas
- Ply On Frame: This is another popular construction method that begins with the creation of a wooden frame commonly known as “ribs”. The next step is to build frame members which are joined to the ribs through slots. The individual frame members are the keelson which is a frame that runs down the center of the boat, the sheer clams which run at the top of each side of the boat and the chine log which are two frames that run along the bottom of the boat and curve up to join the sides of the hull. The joint is called a chine
- Strip Planking (Carvel): Strip Planking is a quick method of building a wooden boat since there is not much joining to be done. Narrow strips of wood and placed on forms and due to their narrow nature, they can easily be bent to form the shape of the boat. Once the shape of the boat is attained, the strips are then fastened together using strong epoxy adhesives(no fasters are needed in this technique). This is a method suitable for experienced boat builders and not amateurs. This is because there are several methods of strip planking and it should therefore be left to those who know how to go about it. The method is popularly used to create small vessels such as canoes
- Clinker: This is a technique that uses planks of wood that overlap across the edges. This overlapping joint is called a “land”. Clinker, also called lapstreak, creates a boat that is generally lighter and easy to sail. There is less water being displaced along the sides of the hull, which increases the efficiency when the boat is moving. The use of this technique is also for the experts and not amateurs
- Cold Molding: This is a method that uses two or more layers of wood to create the hull. This is a composite method and the wood is known as veneers. The veneers have different orientations, resulting in a powerful hull similar to one made of fiberglass but are much lighter in weight. The orientation is 45 degrees from the center line of the veneer and is also referred to as the double-diagonal method. Cold molding may simply use the layers of veneers or has basic strip planking layers, followed by the veneers. Cold molding is used to create all types of boats, from small boats to large wooden superyachts. To build a boat, the builder uses different woods to put more density in areas of high stress and makes the low-stress areas such as the bow and stern out of lighter veneers
The most popular construction method used to build a wooden boat is the stick & tape method, also known as the "tack and tape method".
How Do You Waterproof A Wooden Boat When Building It?
To waterproof a wooden boat:
- Prepare the wood for applying waterproof materials: Make sure that there are no loose layers of wood shavings or others finishes by properly sanding the wood on the boat. Start off with a rough sandpaper to remove the loose parts and then use a fine one to give the wood a fine smooth finish
- Apply the sealing compound: Using a brush, apply a marine-grade epoxy sealant. Make sure the coats dry completely before applying a second or third coat of the sealant to the wood
- Let the wood cure: A marine-grade epoxy sealant can take up to 7 days to fully cure. Read the instructions on your specific epoxy sealant for exact timeframes but allow for up to 7 days
Although the wooden boat is now waterproofed, it's important that you periodically remove the boat from the water, typically every 2 months, and inspect the wood to make sure that there are no moisture-laden surfaces.
This way, the wooden boat is not exposed to water and moisture for a long time.
What Are The Benefits Of Building A Wooden Boat?
The benefits of building a wooden boat are:
- It costs less money: Building a wooden boat is 30% to 40% cheaper than buying a wooden boat
- Better customizability: Wooden boats can be designed and built to suit individual preferences and needs allowing for a high degree of customization. This can be especially important for those who plan to use the boat for specific purposes such as fishing or leisure activities
- Aesthetic appeal: Wooden boats are known for their classic and timeless beauty. The natural grain and texture of the wood can give the boat a warm and inviting appearance
- Sense of personal fulfillment: Building a wooden boat can be a challenging and rewarding experience that allows individuals to learn new skills and develop a sense of personal fulfillment
- Ease of repair: Wooden boats can be easier to repair than boats made of other materials. If a section of the boat is damaged, it can often be replaced or repaired without having to replace the entire boat
What Are The Disadvantages Of Building A Wooden Boat?
The disadvantages of building a wooden boat are:
- Vulnerability to water damage: Wood is prone to water damage which can cause rotting and cracking. If not properly maintained, this can lead to boat structural problems and ultimately compromise the safety of the vessel
- Higher maintenance costs: Wooden boats require more maintenance than boats made of other materials. They need to be regularly inspected, sanded, painted, and varnished to prevent water damage and maintain their appearance
- Fire hazard: Wood is a combustible material making wooden boats more susceptible to fires. This can be a safety hazard and increase insurance costs
- Susceptibility to pests: Wooden boats are more susceptible to pests like termites and woodworms which can weaken the structure of the boat and require costly repairs
What Should Be Avoided When Building A Wooden Boat?
When building a wooden boat, avoid:
- Building a boat without a plan: Boat builders should avoid building a wooden boat without following a plan with design drawings and dimensions
- Using poor quality materials: When building a wooden boat, avoid using low-quality materials to construct the boat as this will become problematic when the boat is out on the water
- Not adding a protective coating: When building a wooden boat, avoid not adding a protective coating to the wood and this will leave it exposed to the harsh marine environment
- Rushing the building process: Building a wooden boat takes time and patience. Rushing the process can lead to mistakes, poor craftsmanship, and other problems that can affect the boat's quality and safety